Managing Assignments
Assignments are how you send requirements out to employees. You create an assignment, link it to a published requirement, choose who should receive it, and publish it. From there, you can track progress, export reports, and close the assignment when you are done.
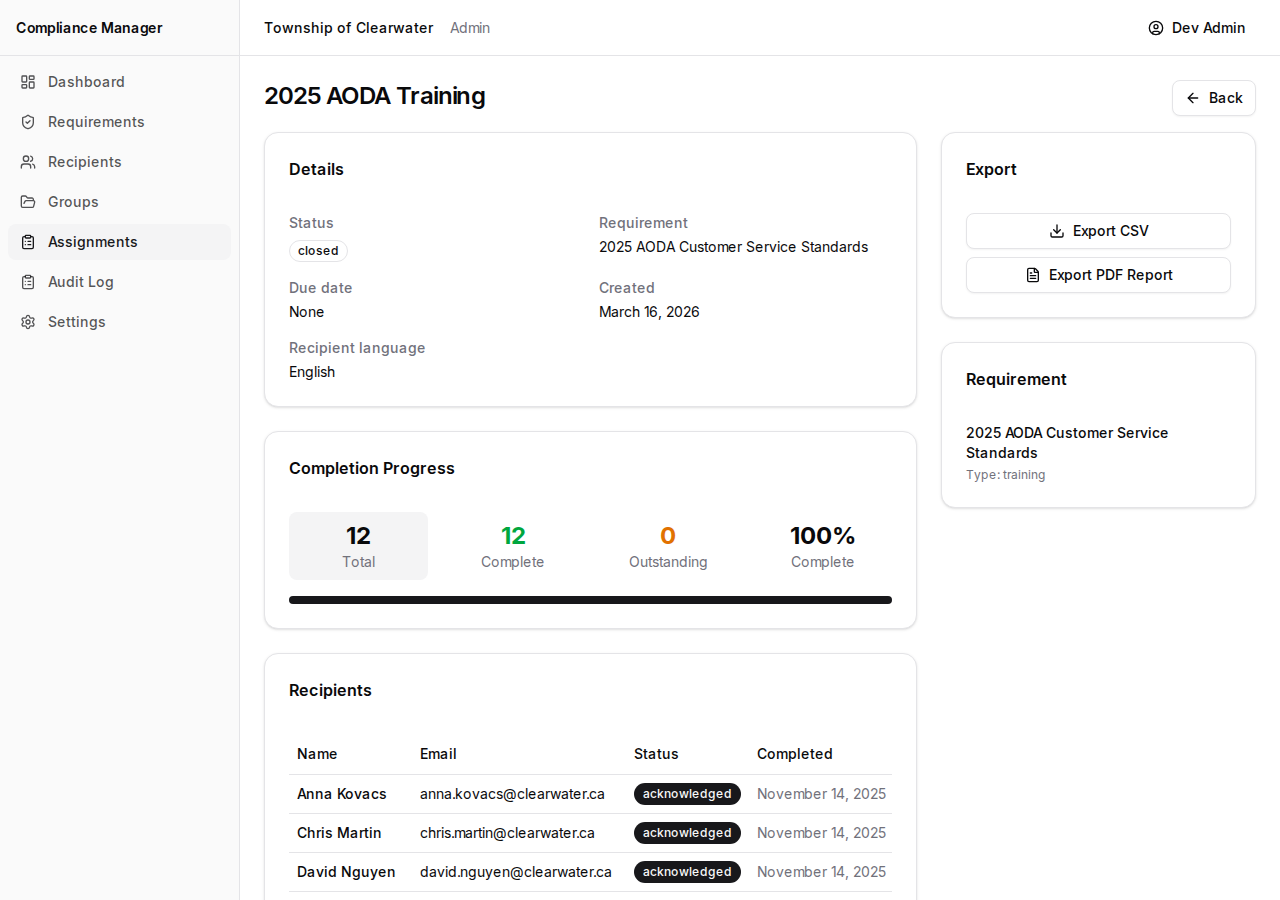
Viewing Assignments
Section titled “Viewing Assignments”Click Assignments in the sidebar to see all of your assignments in one place.
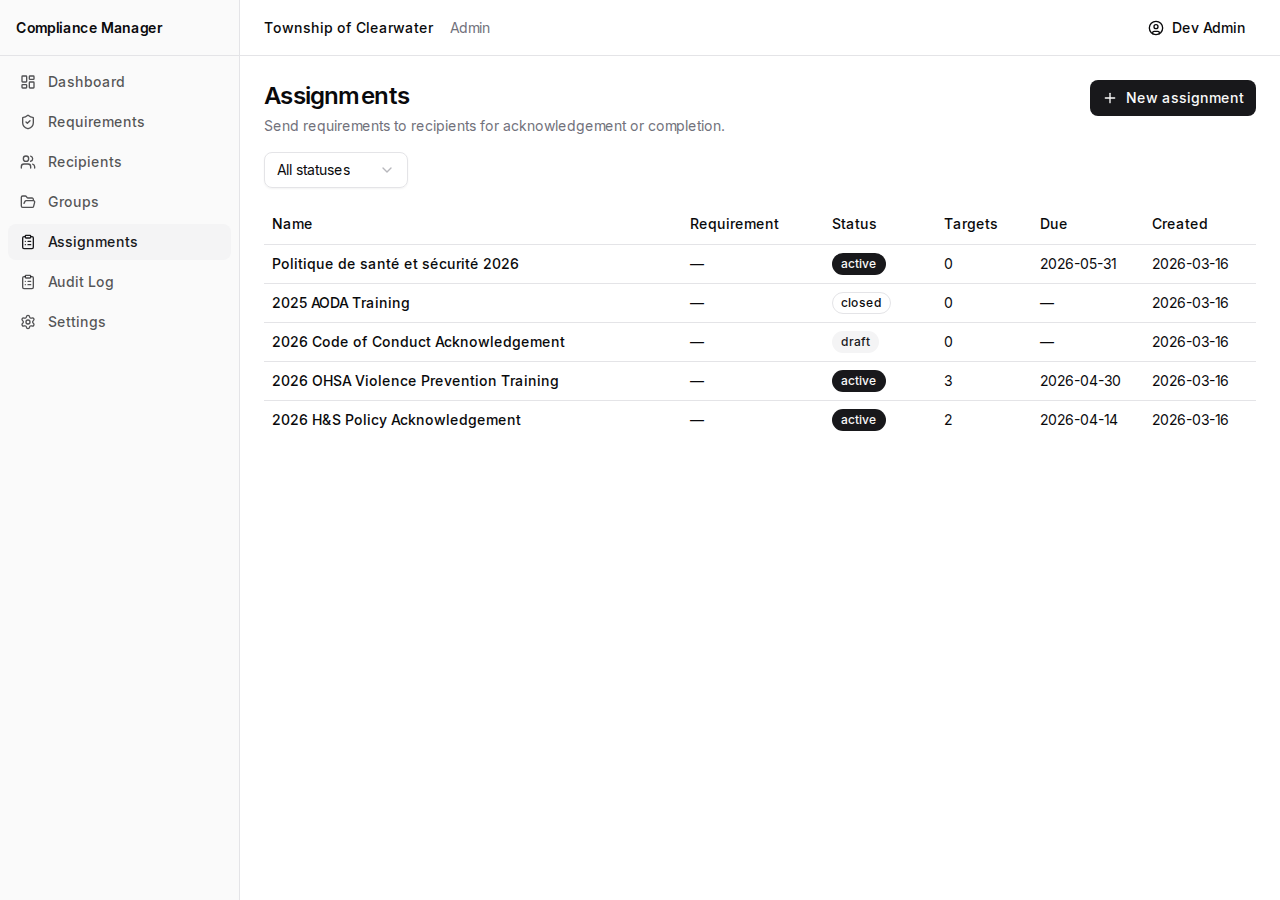
The table shows:
- Name — the name you gave the assignment.
- Requirement — which published requirement is linked to this assignment.
- Status — a badge showing whether the assignment is Draft, Active, or Closed.
- Targets — how many recipients are included.
- Due — the due date, if one was set.
- Created — when the assignment was created.
Use the status filter above the table to narrow the list down to just drafts, active assignments, or closed ones.
Creating an Assignment
Section titled “Creating an Assignment”- Click New assignment at the top of the Assignments page.
- Fill in the following fields:
- Assignment name — a short, descriptive name (for example, “2026 OHSA Training Acknowledgement”).
- Document — select a published requirement from the dropdown. Only published requirements appear here.
- Due date (optional) — pick a date if you want to set a deadline.
- Recipient language — choose English or French. This controls the language employees will see on their acknowledgement page and in the email they receive.
- Click Create assignment.
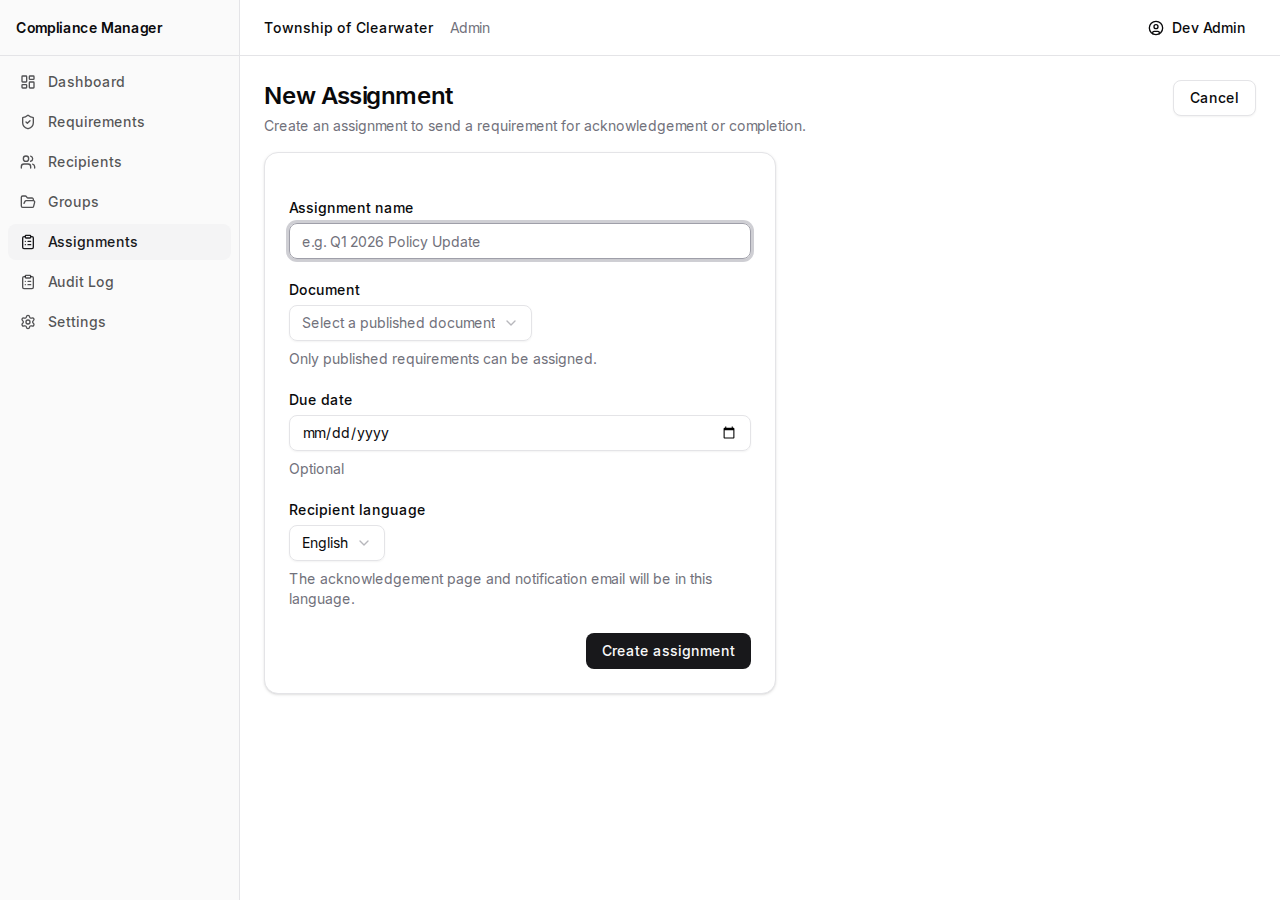
The assignment is created in Draft status. No one is notified yet — you still need to add recipients and publish it.
Adding Targets
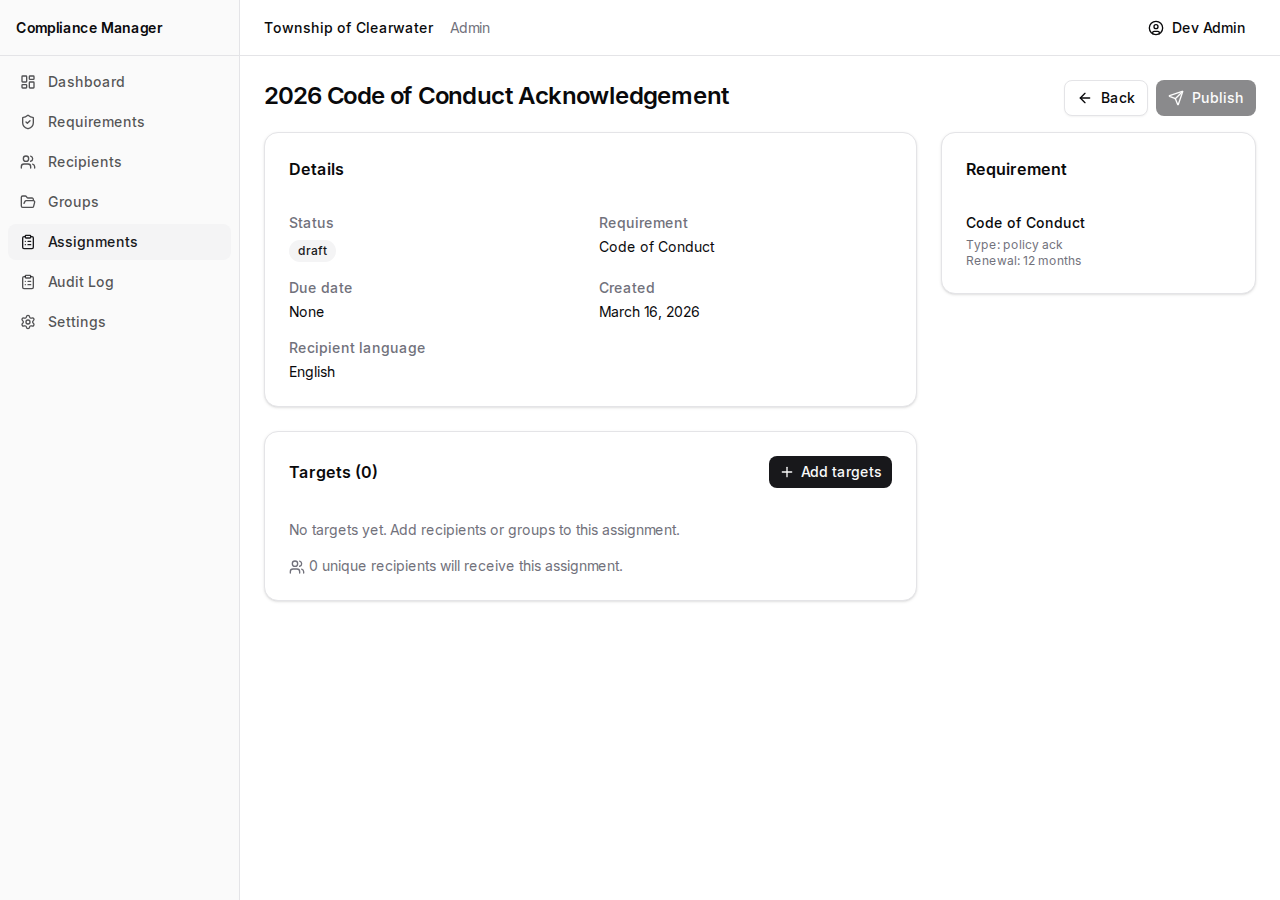
Section titled “Adding Targets”While the assignment is still in draft, you need to add the people who should receive it.
- On the draft assignment page, click Add targets.
- Search for individual recipients or groups.
- Select the ones you want with the checkboxes.
- Click Add.
After adding targets, you will see how many unique recipients will receive the assignment. If a person appears in more than one group, they are only counted once.
Publishing
Section titled “Publishing”When your draft assignment has all of its targets and you are ready to send it out:
- Click Publish.
- A confirmation dialog will appear. It shows how many recipients will be notified and includes a checkbox to enable automatic reminders (see below).
- Confirm to publish.
The status changes from Draft to Active. This cannot be undone. Once published, employees will receive an email with a link to acknowledge the requirement.
Automatic Reminders
Section titled “Automatic Reminders”When you publish an assignment, the confirmation dialog includes an opt-in checkbox: Send automatic reminders to non-responders. Checking this box turns on reminder emails for any recipients who have not yet acknowledged.
How Reminders Work
Section titled “How Reminders Work”- Reminders are sent every 3 days to recipients who have not acknowledged.
- A maximum of 5 reminder emails are sent per recipient.
- Reminders are only sent during Toronto business hours (Monday to Friday, 9 AM — 5 PM Eastern), excluding Ontario statutory holidays. Your staff will never receive a reminder email on evenings, weekends, or holidays.
- Each reminder includes a direct link for the recipient to complete their acknowledgement, just like the original notification.
Escalating Tone
Section titled “Escalating Tone”Reminder emails follow three escalating tones so that the language matches the urgency:
- First reminder — a friendly nudge letting the recipient know the document is still awaiting their acknowledgement.
- Middle reminders — a neutral reminder that the document is still outstanding.
- Final reminder — a clear notice that this is the last reminder, and that if no acknowledgement is received, their administrator will be notified.
All three variants are available in English and French, matching the recipient language you selected when creating the assignment.
Admin Escalation Digest
Section titled “Admin Escalation Digest”After a recipient has received all 5 reminders without acknowledging, they are flagged for escalation. Once per business day (at 4 PM Eastern), an escalation digest email is sent to all administrators in your organization. The digest lists every recipient who has exhausted their reminders and still has not responded, grouped by assignment.
This gives you a clear picture of who may need direct follow-up, without requiring you to check each assignment individually.
Tracking Progress
Section titled “Tracking Progress”Once an assignment is active, the assignment page shows you exactly where things stand.
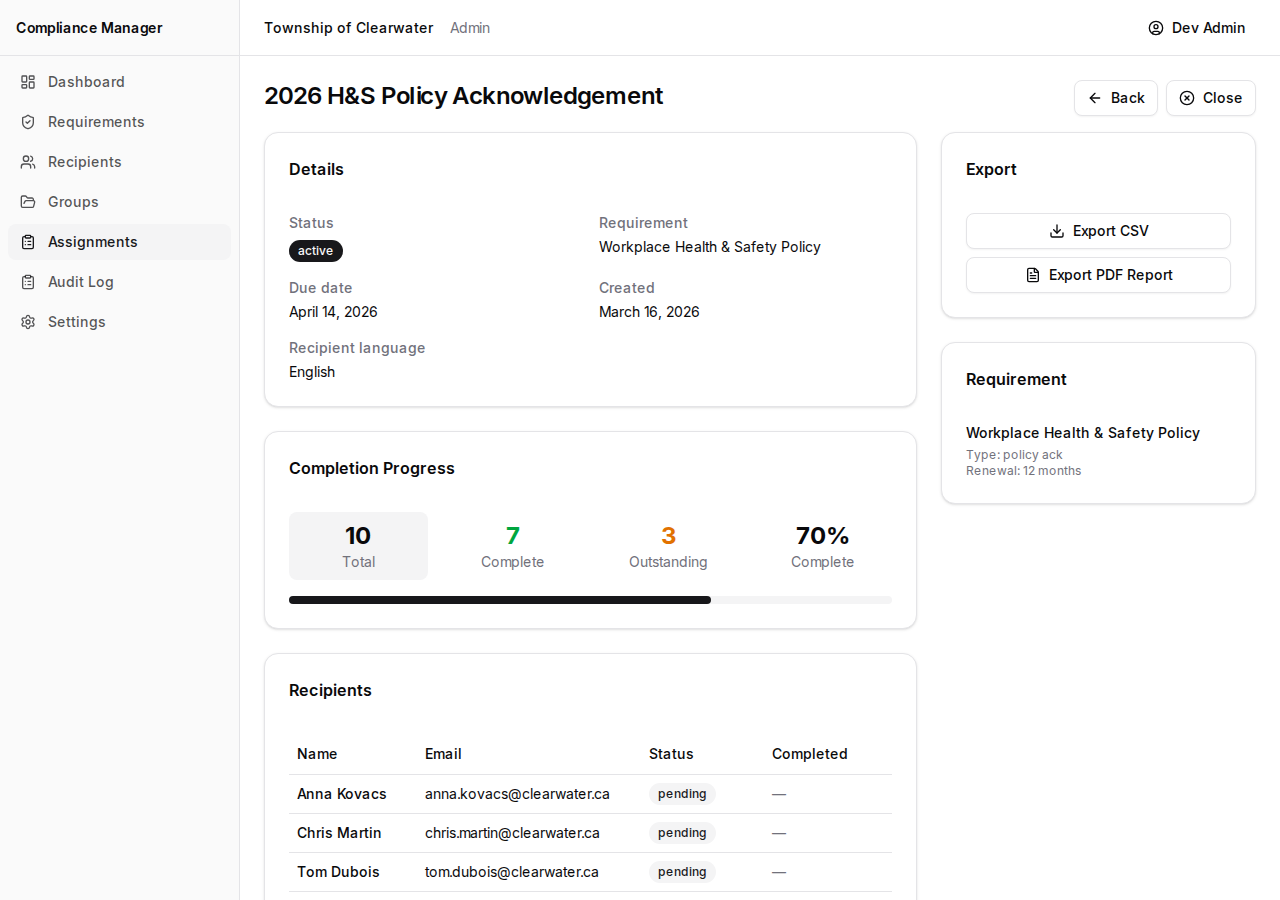
At the top, the Completion Progress card shows:
- Total — the number of recipients.
- Complete (green) — how many have acknowledged.
- Outstanding (amber) — how many have not yet acknowledged.
- Percentage — the overall completion rate.
A progress bar gives you a visual sense of how close you are to full completion.
Below the progress card, a recipients table lists each person with their:
- Name
- Status (Pending or Acknowledged)
- Completion date (if they have acknowledged)
Click the stat buttons (Complete or Outstanding) to filter the table and see just the group you are interested in.
Exporting Reports
Section titled “Exporting Reports”In the right sidebar of an active assignment, you will find two export options:
- Export CSV — downloads a spreadsheet you can open in Excel or Google Sheets. Useful for sorting, filtering, or sharing with colleagues.
- Export PDF Report — downloads a formatted report that is ready to print or attach to an email for your records.
Marking Employees Complete (Clerk Workflow)
Section titled “Marking Employees Complete (Clerk Workflow)”Some assignments track training that employees complete in person — for example, a classroom safety session. For these training-type assignments where the completion method is set to “Clerk-marked,” a Mark employees complete button appears on the assignment page.
This lets you, the clerk, record completion on behalf of employees who attended in person.
- Click Mark employees complete.
- Set the completion date (the date the training actually took place).
- Add an optional note (for example, “Completed during in-person OHSA session”).
- Paste the recipient IDs of the employees you want to mark as complete.
- Confirm.
Their status will change to complete with the date and note you entered.
Closing an Assignment
Section titled “Closing an Assignment”When an assignment is finished — whether everyone has acknowledged or you simply want to stop accepting responses — you can close it.
- Click Close on an active assignment.

- A confirmation dialog will appear. Closing the assignment prevents any outstanding recipients from submitting their acknowledgement after this point.
- Confirm to close.
The status changes to Closed. Any employees who had not yet acknowledged will no longer be able to use their link.